It is back. Project Recycled!
This season is going to be a little more abbreviated then the last because we have only four contestants, but it looks like it is going to be a tough race to the end!
Voting is now Closed
Projects after the jump...
Vest to Pants
I am so excited to be here, participating in the second season of Project Recycled!
I think this Robin's idea is wonderful!
Still, had some problems with this task. You see, I am so into recycling I couldn't decide what to sew. Then, one day, I was helping my grandmother do the laundry and I ran into this vest. I t belongs to my grandfather. I mean, it belonged to him until I saw it:-)
It was perfect for summer cargo pants I was planning to make for my son!
So, I started with this vest, completely took it apart and then used pattern I always use for sewing my kid´s pants.
What was fantastic about using this old vest is that all the difficult parts are already done for you. The pants came together incredibly fast!
I mean, it really takes some time to make pockets like this. My trick is you simply make sure that all the pattern pieces are correctly placed on the old item you are recycling.
This left me with a professional looking pockets and hardly any effort. I really love the way they turned out..
..and my son will enjoy wearing them!
My children are at the stage where they like to have sleepovers at their friends sometimes, and recently I watched them pack their bag and noticed how their toothbrush just got thrown in with the rest of their gear. So I decided they needed their own "Sleepover Bathroom Caddy". Just something to keep everything neat, organized and together.
It takes some simple materials that you are bound to have around your home to create one of these:
I used an old wire coat hanger, some sample material that I had picked up second hand, some bias tape (also thrifted) and a plastic sheet packet that I had saved.
The kids can pack in their toothbrush, toothpaste, hairbrush/accessories or any medications they require.
Then they fold down the hook:
Fold up the bottom:
Then fold one last time to secure it with the velcro fastenings.
Now they can toss it in their overnight bag and get down to the real business of just having fun!
Thanks for having me here for Project Recycled Robin, I'm very excited to be participating in this season!
Receiving Blanket to Child’s Apron
I’m so excited to be here! This contest really pushes my creativity and is the best motivator to get me to complete projects (which can be an anomaly for me sometimes!).
This week was my niece’s 3rd birthday and I had to scramble to make a gift.
I saw an unused receiving blanket sitting on my shelf and got to work.
I thought an apron would be perfect & quick too!
I used another apron as a guide & cut the pattern out. (You could measure your child armpit to armpit, hip to hip+ 2”, and desired length; then make your own pattern.)
Next I cut 2 23”x2” strips for the waist ties, and a 15”x2” strip for the neck strap, and 2 6”x5” pockets (I ended up scraping the neck & waist straps).
Sorry my camera battery died and I was on a time-crunch so I didn’t take any more pictures as I worked, but I just folded and ironed the pocket edges ½” in on every side and top stitched the top edge of the pockets.
Then I lined up the outside edge where I wanted them on the apron and sewed just that edge (top stitching).
Next I scooted the opposite edge over a few inches (so that it formed an arch) and sewed that edge down (top stitching again).
Then I centered the pocket and folded the bottom outer edges down and sewed the bottom edge flat.
I decided to use some cheerful yellow ribbon (5/8” grosgrain) I had on hand to brighten up the whole look. I used the ribbon as bias tape around the parameter of the apron and sewed as the waist ties. For the neck I wanted it adjustable, so I sewed 3 button holes along the strap. Last I sewed a button to the front corner for the strap to attach to.
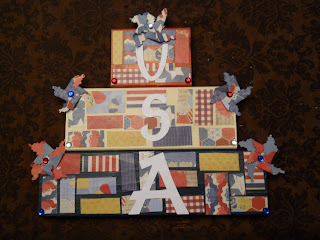
 |
| Finished Apron! |
|
|
Orange Sweater to Sweet Cardigan
I had received this beautiful sweater material shirt from my real estate agent a while ago- he was getting rid of clothes and thought my husband might wear it. Well, my husband wouldn't wear it but I wasn't going to get rid of such pretty fabric.
Sweater Before
Using an old cardigan I had as a pattern I re-sized the whole thing and made it into a cardigan. I like to call it the "Pumpkin Spice Cardigan" because of its beautiful burnt orange color. I added crocheted trim and hook and eyes as closures.
I will probably wear it some this spring but I really look forward to wearing it next fall!


Comments